
by Gregor Steele
This guide is written for Android 4 Jelly Bean. There may be minor differences if you are using a different version.
We’ll assume:
-
You have taken a video on your tablet
For training purposes you can download one of the sample videos provided here:
free fall, pendulum (the meter stick is 0.4m, the videos should be analysed in portrait mode) -
There is something in the plane of motion whose dimensions you know (e.g. a metre stick).
Open the app. Note that if you are connected to the internet, you may see an advert banner whilst using this app. In our time of using it, we have never seen anything we would consider “inappropriate”.
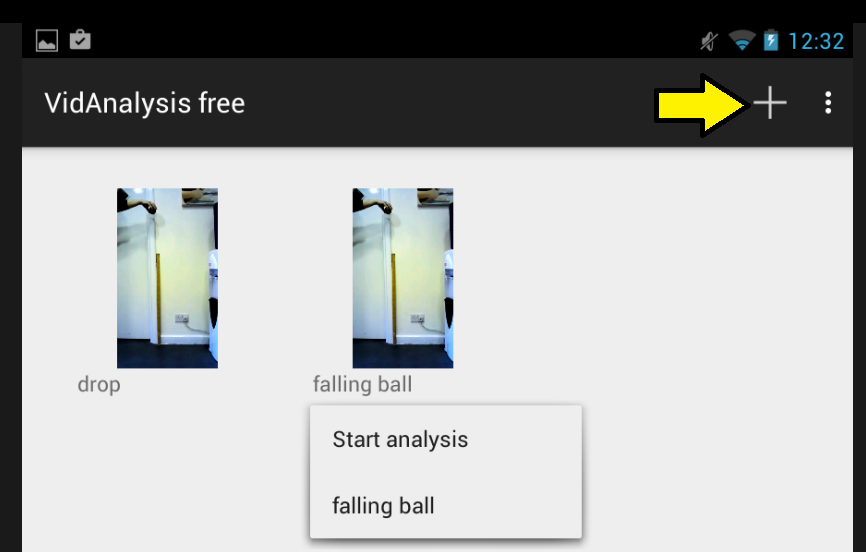
If you have used it before, the videos you have loaded will appear. Tapping on one gives you the option to start analysing it or to load a previous analysis.
To load a new video for analysis, tap the + icon.
You may then be asked if you want to complete the action using Photos or Gallery (this is one point where other versions of Android OS may behave differently).
Choose Gallery. You may then have to touch Just Once.
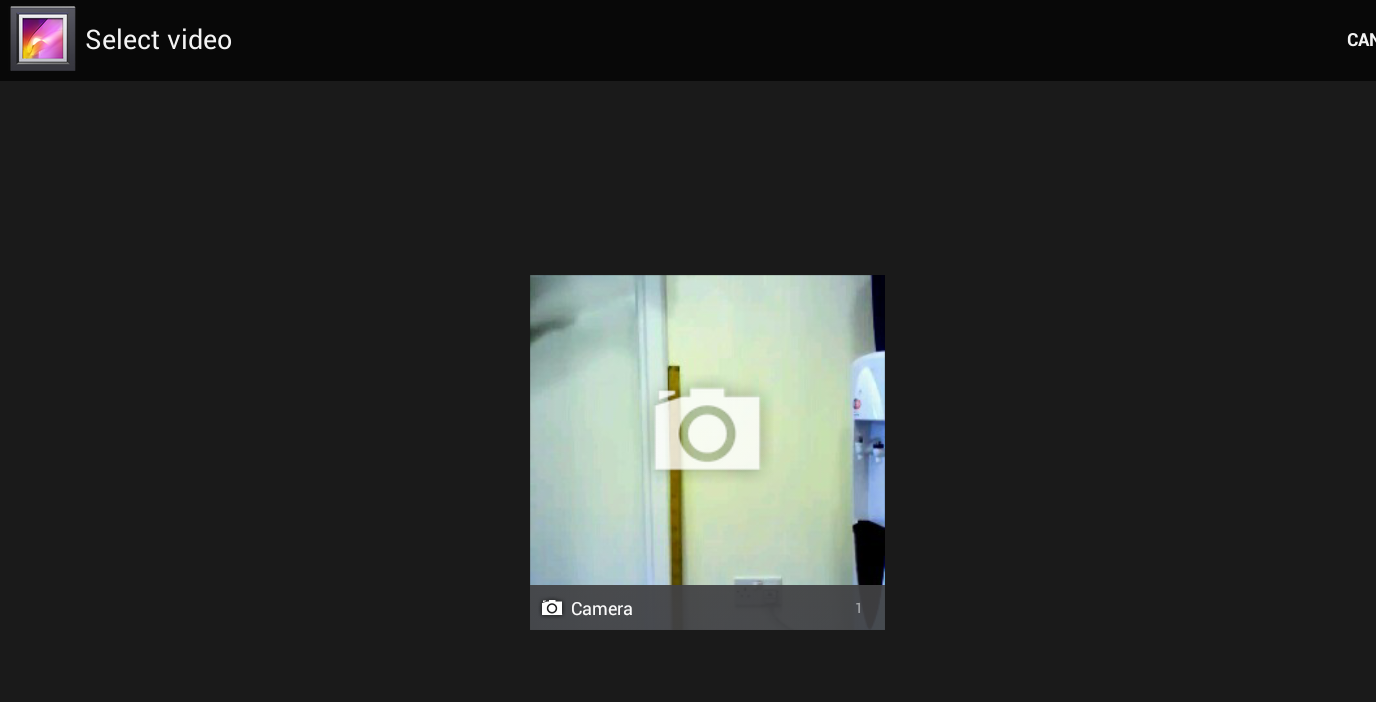
Your video should be there, along with any others you have taken or stored on the tablet.
Tap your video. You are then asked to give it a name.
It should now appear on the VidAnalysis opening screen.
Tap the video.
It should now open up in a player.
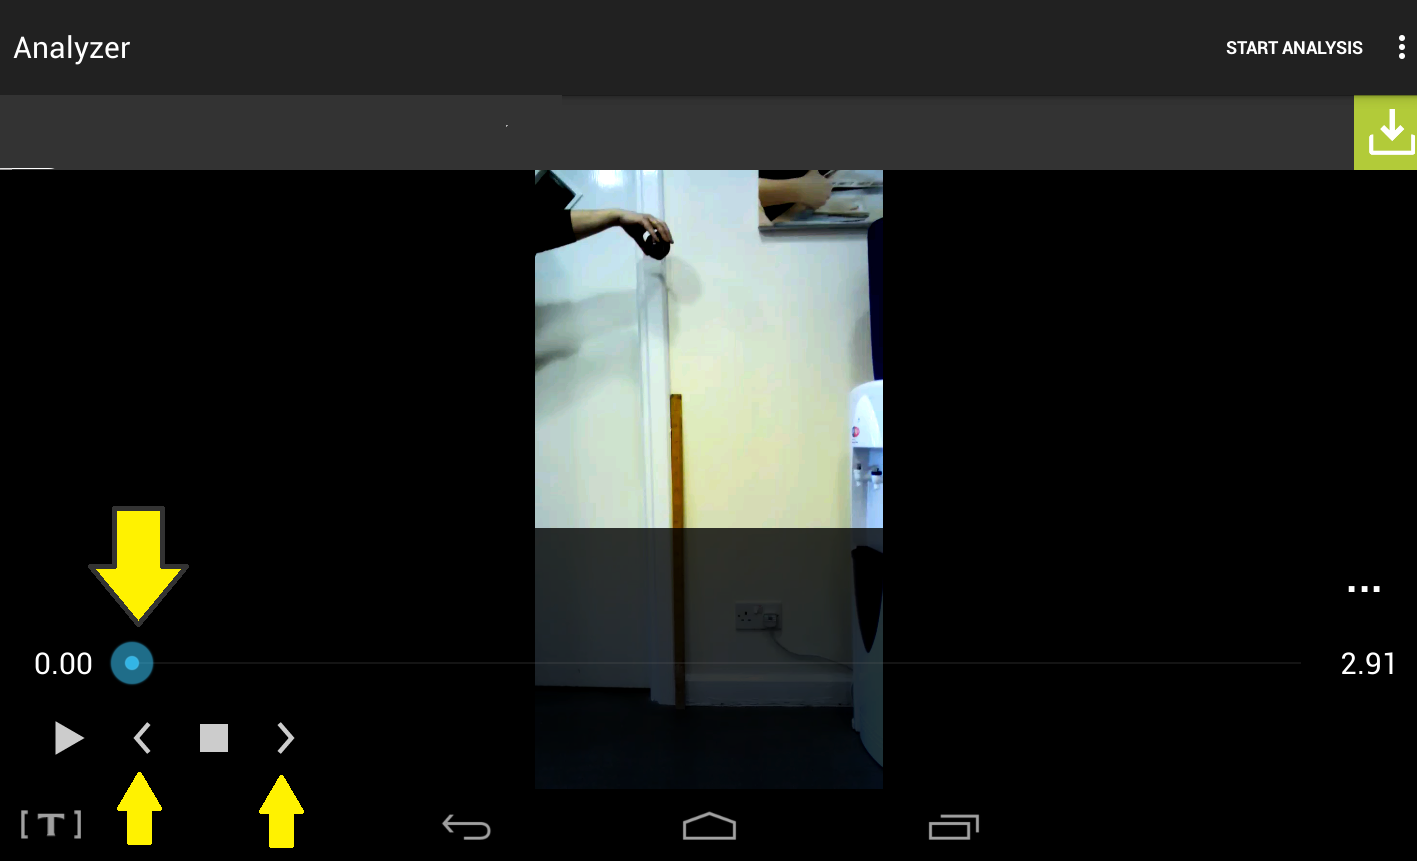
If the object you are going to investigate doesn’t start moving at the very start of the video, use the blue slider and the <> buttons to advance through the video to the first point at which the object begins to move. We strongly recommend that you do this.
When you’ve got to this point, tap Start Analysis, found at the top right of the screen.
The first thing you have to do is to mark two points at either end of a known length. This should be in the plane of the motion. We used a metre stick.
 Once you make a mark, you can’t drag it around. We found accurate marking to be very hit-and-miss. If you are not happy with the position of your marks, tap the three little dots at the top right of the screen. You will then have the option to recalibrate. Do ask yourself how critical accurate measurements are – to us, this app was more about the shape of graphs than finding g to several decimal places.
When you have made your two marks, you will be asked what distance (in metres) is represented in real life. In our case this would be 1 metre.
“Well… duh!” moment – we were well through writing this guide when we realised that portrait format videos should be analysed with the tablet held in portrait mode!
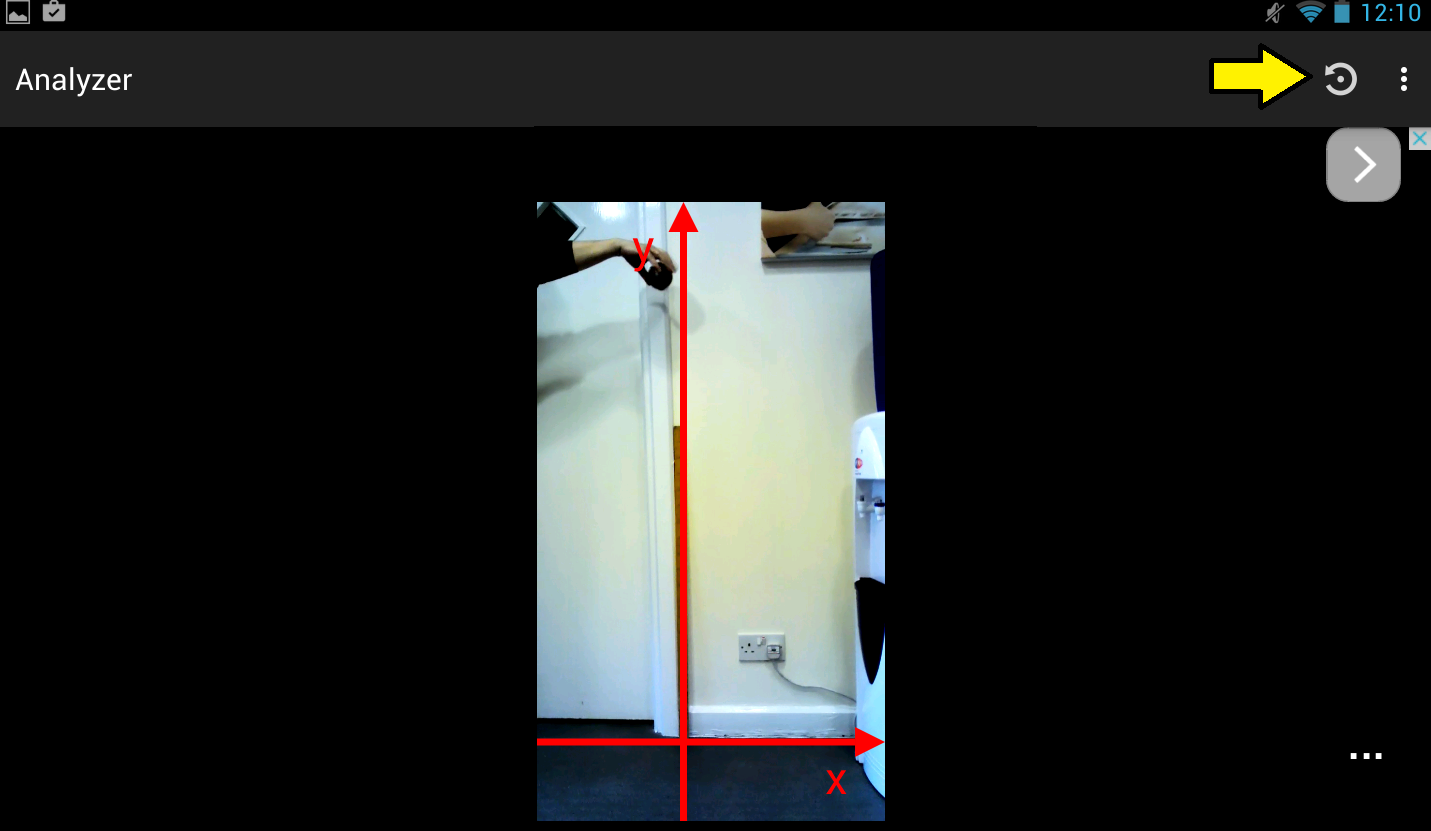
Next, move the origin of the coordinate system to a suitable place. We set it to the base of the metre stick. Note that the curled arrow button at the top right of the screen can be used to rotate the axis through 90 degrees. (…) If you want to analyse an object running down a slope, we suggest that you angle your tablet so that its edge is parallel to the slope before filming.
Once you have the axes in position, click the tick at the top right of the screen. This is obscured by the yellow arrow in the picture above.
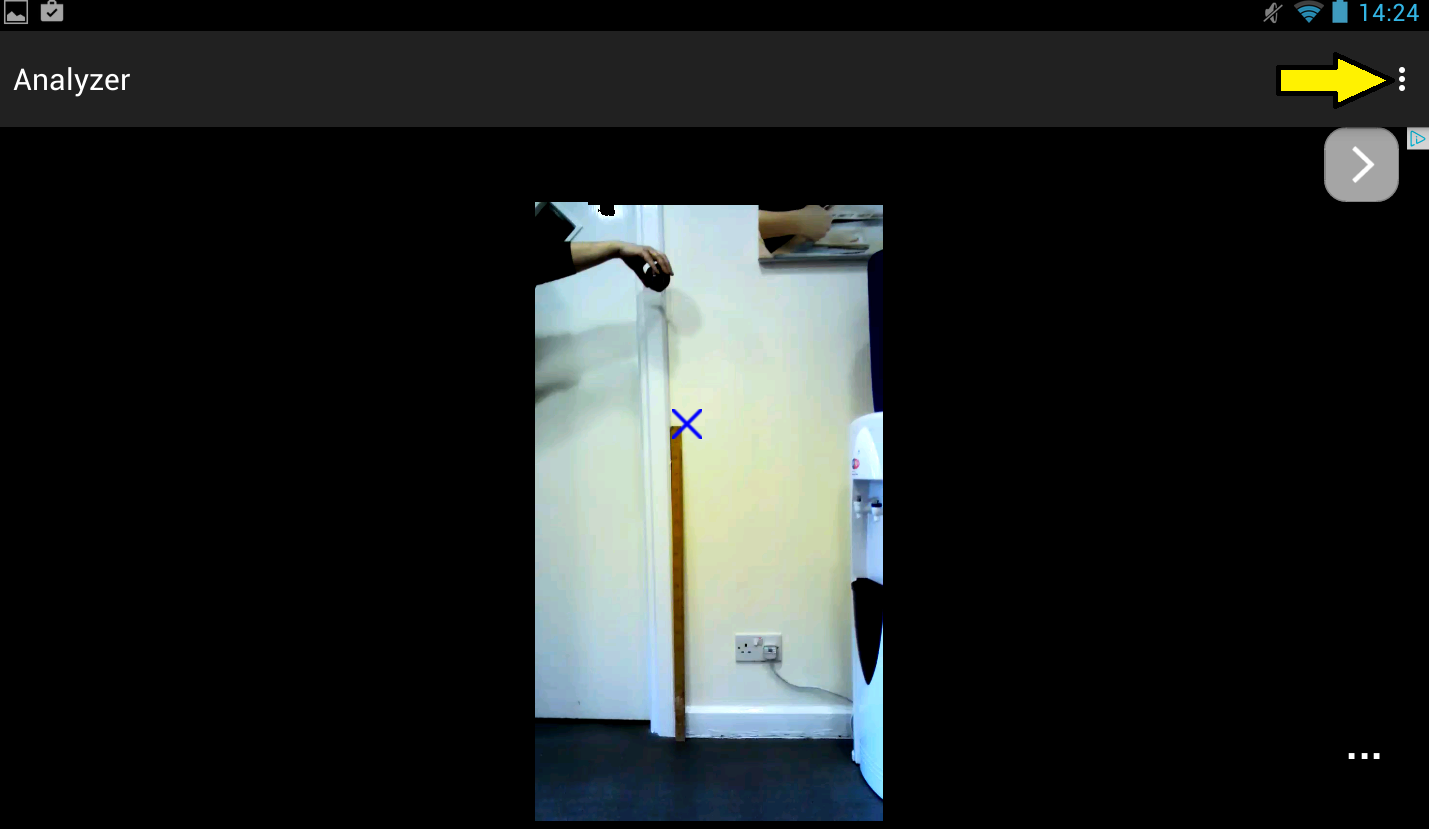
Now tap the object you are following. A dark blue cross appears. The video then advances one frame. Tap the object again, and so on. If you think you have tapped in the wrong place, touch the three horizontal dots at the bottom right of the screen.
This brings up the video controls. Tap < to go back one frame. You should see your last cross in light blue. Touch the new position you want to mark. Touch the three dots again to remove the video controls.
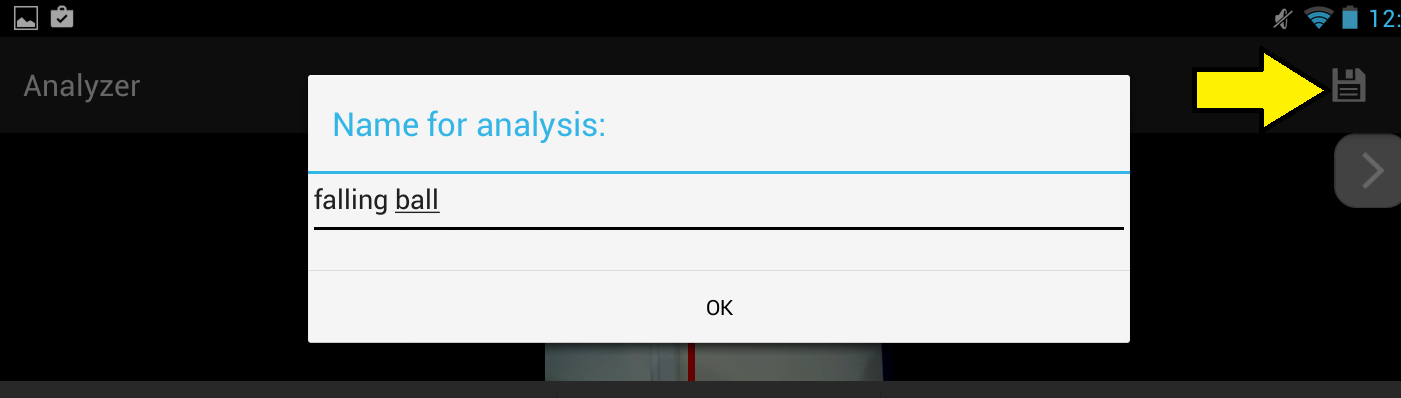
When you have tracked as many points as you want to, tap the disc icon at the top right of your screen. You will then be asked to give your analysis a name.
When you have tracked as many points as you want to, tap the disc icon at the top right of your screen. You will then be asked to give your analysis a name.
You can now swipe through a variety of graphs and a data table. We particularly like this vertical velocity “sawtooth” graph of a bouncing ball.
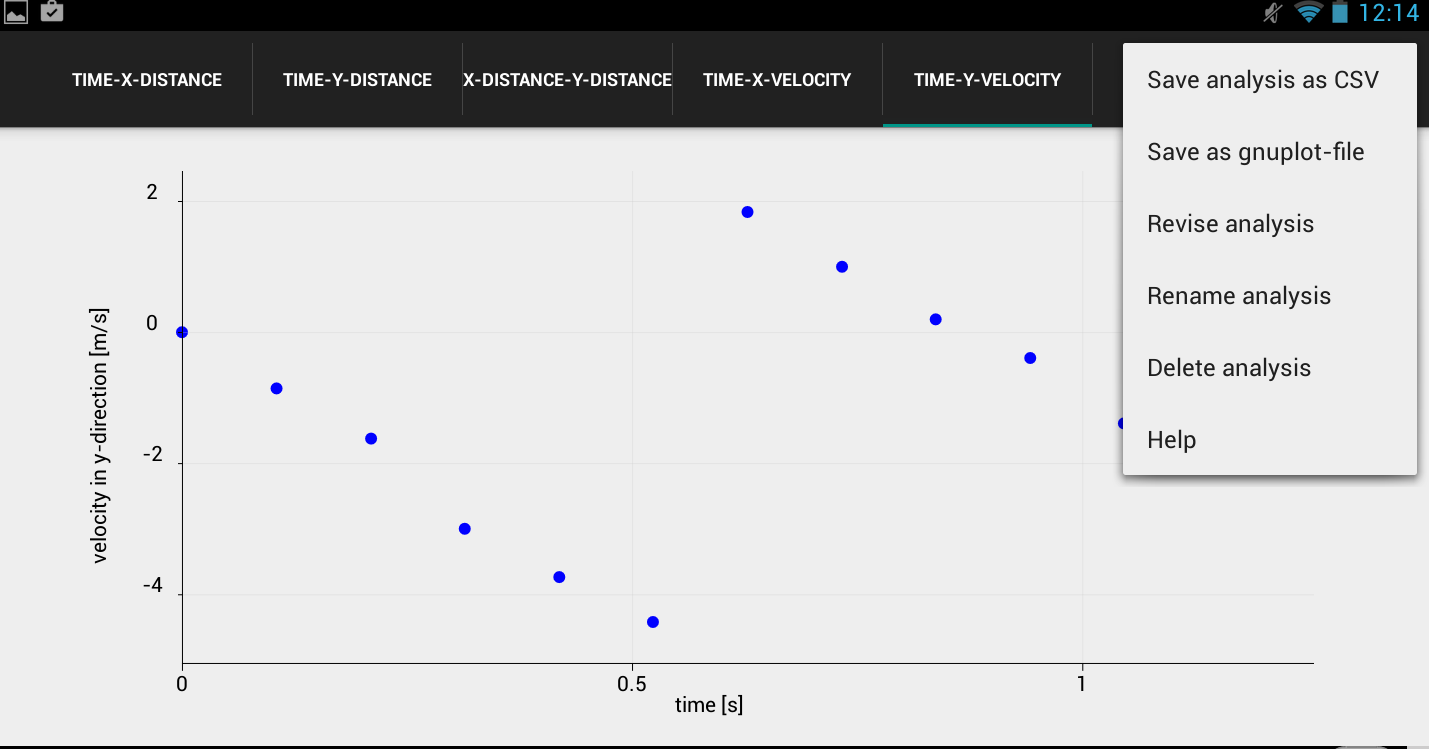
Tapping the three dots at the top right brings up a menu where you can go back and change the position of points or export your data as a spreadsheet-compatible file.
Top tips
-
When setting up a situation for analysis, use a dark object against a light coloured background.
-
If motion is on a slope, film it with the tablet parallel to the slope.
-
If your video is in portrait orientation, hold your tablet in this orientation when analysing.
-
If the object you are following is moving rapidly, it will appear as a streak on your device. When tracking it, always tap on the same position on the streak (e.g. the middle).
Sincere thanks to Gregor Steele of SSERC for writing this awesome guide!